

How To Change Light Bulb In Sub Zero Fridge
Sub-Goose egg Fridge Light Bulbs Replacement Guide
How to modify a burnt out light bulb in a Sub-Zero 500 series refrigerator or freezer including the function numbers.
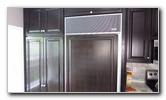
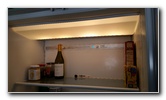
Sub-Zero 550 Fridge

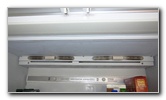
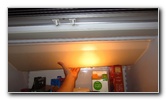
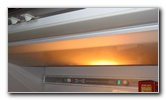
Lens Cover & Iv Lights
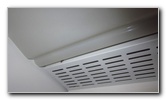
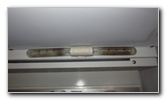
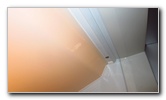
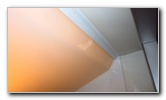
Rear Edge of Lens Cover
Owners of other Sub-Zero refrigerator and freezer models, wine coolers or Wolf brand appliances such as the 501F, 501R, 511, 542, 532, 561, 590, 600 serial, 661, 611, 611G, 650 and 650G may as well find these DIY instructions to be helpful.
The OEM (original equipment manufacturer) light bulbs were 75W (watt) units.
SubZero currently recommends using 40W 120V T6 1/2 (T6.5) E17 intermediate sized threaded base bulbs.
A few compatible replacement 40 watt light bulbs with their role numbers are as follows: Sub-Zero 7014647, Feit Electric 5300136187 and TacParts B01KGNOINK.
No tools are needed to admission and replace the calorie-free bulbs.
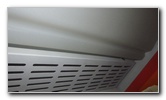
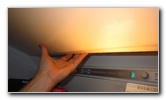
Right Rear Corner

Gently Pull Forrad
Releasing Rear Edge
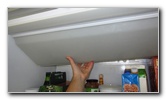
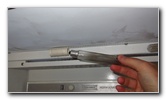
The next ii steps are to open up the refrigerator door and then clear off any breakable glass or fragile items from the height shelf.
Then apply both of your hands to gently pull on the crevice or aqueduct that runs forth nearly the back edge of the translucent white plastic lens cover.
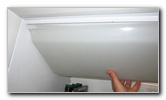
Keep pulling the lens comprehend forward until it flexes plenty for you lot to remove the rear edge from its slot and past the 2 silver metal screws.
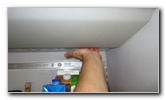
Rear Border Released
Gently Lower Back of Lens
Pull Out Lip At Front Edge
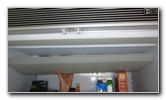
And then motility the lens embrace forward abroad from yourself and towards the back of the refrigerator.
Slip the front edge of the lens embrace out of its slot.
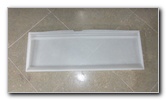
Lens Embrace Removed
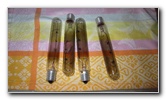
4 Old Calorie-free Bulbs
Burnt Out Lamps
Carefully remove the burnt out light bulbs past twisting them in the counterclockwise direction.
If you lot accept trouble loosening the sometime bulbs, I highly recommend putting on protective gloves to protect your fingers from being cut just in case the one-time bulbs shatter or intermission off the metallic base.
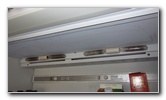
Old 75W (Watt) Bulbs
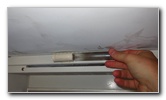
Loosen Counterclockwise
Old Lite Seedling Removed
Former Light Bulbs Removed
Empty Bulb Sockets
Insert the new 40W T6 one/2 E17 base bulbs in to the sockets and rotate them in the clockwise direction until are fully seated.
Endeavour to avoid over tightening the bulbs to prevent from corking the new bulbs, breaking them off their metallic bases or damaging the plastic sockets.
If you'd like to upgrade your bulbs to brighter and longer lasting units, here are some E17 Base LED Bulbs.
A few tubular shaped E17 LED bulbs that might be uniform include the Kakanuo E17 LED, KINGSO E17 5W LED and the U xcell E17 Socket 5W 64 LED.
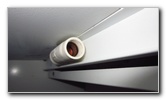
Re-Insert Front Edge Lip
Front Edge Secured
Slide Lip In To Place
And so raise the rear side of the lens cover.
Gently Flex Rear Border
Re-Attach Rear of Lens
Four New Low-cal Bulbs!
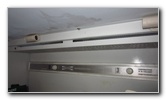
Double check that the lens cover is securely in place.
Savor the bright and articulate view of your nutrient! ![]()
If yous need to replace a burnt out freezer light bulb, they are easily accessible with out needing to remove a lens comprehend.
600 Series Owners - To remove the light diffuser (lens embrace), follow these steps. i. Place your ii hands under the lens cover and release the two clips on the dorsum edge. The clips are tabs that should be pulled or rotated down. 2. Lift the lens comprehend upward and slide information technology toward the rear of the fridge until the slots on the side of the light cover driblet past the mounting studs on the side walls. 3. Remove the light shield and set it aside in a safe place.
For more, cheque out all of my other Home DIY Repair & Maintenance Guides.
Source: https://www.paulstravelpictures.com/Sub-Zero-Refrigerator-Light-Bulbs-Replacement-Guide/
0 Response to "How To Change Light Bulb In Sub Zero Fridge"
Post a Comment